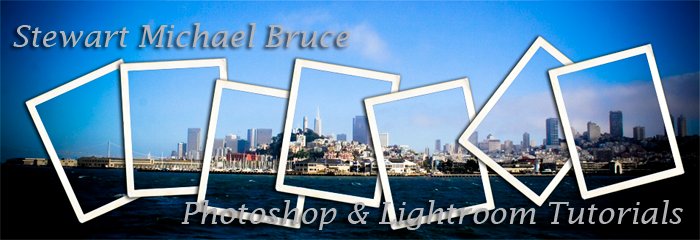
Step-by-Step Workshop
Large-Format Printing
Create a striking design and prepare
it for large-scale printing.
Welcome to this week magazine
In this Workshop tutorial, we are going to learn how to take a series of photographs to create a panoramic image by bringing them all into Adobe Photoshop CS4 and applying the Photomerge tool. By merging together several photographs, we will attempt to turn different sections of each object into a single, stunning panoramic photograph. This will encompass the first part of the tutorial. In the second part of the tutorial, we will learn about layering, masking and colour correction when creating our illustration. When designing images for large-format printing, you should always remember to have the resolution at 300dpi or 360dpi. If you set your resolution lower, ie at 72dpi, when you take your image to the printer and enlarge it to an A3 or A2 size, you’ll find the quality of the enlarged print to be very poor. Only use 72dpi when creating graphics meant for specific designs or websites. Additionally, remember that you should always make sure you have your colour setting at Europe General Purpose 2 (European) or North America General Purpose 2 (American). You can find this information under Edit> Color Settings. RGB (sRGB IEC61966-2.1) CMYK (Coaled FORGRA27 (ISO 12647-2:2004) Gray (Dot Gain 15%) Spot (Dot Gain 15%) The image for this tutorial was inspired by an elevated rail track. The curvature of the rail struck us as an ideal focal point for an urban landscape and the creation of this image was born. We took a number of photographs of buildings in different locations. In the end we ended up with about 20 images that we could work with. One good tip is to always keep an organised library of photographs that you have taken, as you never know when they could come in handy. For example, the photographs of the cars that we used in this illustration were taken earlier this year at the Shell Eco Marathon. Another good tip is to always take your camera out with you, as you never know what you will see. A final piece of advice is to always take photos of texture items, such as tree bark, paper types in various forms (crumpled, smooth, etc) and dried leaves. Create a texture folder to keep your photographs in – you never know when you will find that one of these photos will suddenly be the perfect background.

1 A panoramic view
Copy the folder of images (inset folder title, e.g. “SoCal Cityscape”) from the CD onto our desktop. For the first order of business, we are going to create a panoramic photograph from a collection of photographs. In Photoshop, go to File—Automate—Photomerge.
Note: if you wish to create this illustration for yourself please email me @ stewart@stewartbruce.com and I will email you all the images to create this photo-montage.


In the dialogue box, select Layout—Auto and under “Source Files,” select “Browse” to find the images you are going to use—for this Masterclass, “Rail_1_RGB.tif” through “Rail_7_RGB.tif.” Under “Use” we want to select “Files” and make sure that the “Blend Images Together” option is selected. Click OK. Photoshop will work its magic and the resulting image will look much like this screenshot below:

3 Add A Layer & Crop
Note that Photoshop can only do so much and depending on the quality of our photos, there may be small gaps in the merged image. To fix this, create a new layer by going to the layer dialogue box and selecting “New Layer” from the drop-down menu. Using the eyedropper tool, we’ll take a sample of the areas around the gaps/jagged edges then use the brush tool to paint-in the gaps and over jagged edges on the new layer. Once we’re satisfied with the results, select the crop tool and choose about the area shown below. Go to File—Save As and save the image as “Rail Train.”

From the folder on our desktop, open up the file “Train_1_RGB.tif” and go to Select—All and then Edit—Copy. Select the image “Rail Train” and go to Edit—Paste. What we’re trying to create is the illusion of the train being on the track. To do this, we need to position the train in the image so that it’s in the right place (see image below). Once in place, go to Edit—Transform—Scale. Resize the image so that it fits proportionately. We may need to rotate the image a bit so that it looks like the train is sitting correctly on the rail. In the layer palette, click on the mask tool at the bottom and with our brush tool, mask out the background around the train. Repeat the process with “Train_2_RGB.tif.” Flatten the image before saving.

5 More Photomerge fun
To create the next piece of our image, repeat Steps 1 through to 4 using ‘Staples Center_ 1_RG B.tif’, ‘Staples Center_2_RG B.tif’ and ‘Staples Center_3_RG B.tif’. Crop the assembled image as shown in the screenshot. Flatten the image and then save as ‘Staples Center Panoramic’.


6 Start the cityscape
As the focus of this tutorial is large-format printing, we need a larger canvas to work on. Open up a new document and title it ‘Urban Cityscape’. Set Width to 470mm, Height to 302mm, Resolution to 300dpi and RG B to 8 bits (or whatever suits your needs). Open up ‘Rail Train.psd’ separately. To copy this file into the main canvas, go to Select>All, Edit> Copy, click on the new canvas and then paste Rail Train onto the new canvas. If you’re working in CS4, you can highlight the image and simply drag the file onto the Urban Landscape tab at the top of the screen. Repeat this process with Staples Center Panoramic and scale to fit canvas.

7 Take away the sky
Place Staples Center Panoramic over Rail Train, as shown in the screenshot below. Start erasing the background in the two photos. Click on the eye icon in the Layers palette next to the Staples Center Panoramic image layer. This will switch off the layer so we can start masking out the background. In the Layers palette, add a mask, select a hard-edged brush and then set to black,
painting as is needed. Use white in order to recover elements.

“Create a texture folder – you never
know when you will find that one of
these photos will suddenly be the
perfect background”
know when you will find that one of
these photos will suddenly be the
perfect background”
8 Photocopying
At last, a good use for Photoshop filters – photocopying! To get the type of texture that we want for this image, we can either take the images that we are creating and literally photocopy them on a photocopier and then scan the copied images back in as layers, or we can use the Filter Gallery in CS4. Click and highlight Rail Train, the first layer that you are going to work on. In the Layers palette, click on Duplicate. Make sure you are working on the duplicated layer, then click on the Filter drop-down menu. Under the menu box in the Filter Gallery palette, select Photocopy. There, you will see two settings: Detail and Darkness. Set these to 12 and 8 respectively. Now repeat these steps for Staples Center Panoramic. Name your duplicate layers with a photocopy to identify them. Set both of the photocopy layers to Overlay and both of the original layers to Normal.

9 Skyscrapers in the sky
Open up ‘Building_One_RG B.tif’ from the disc. Drag-and-drop the image onto the working canvas. Place the layer at the bottom the layer stack and set to Normal. Scale and stretch this image as seen in the screenshot. Add a mask as you did in the previous steps. Duplicate this layer and, in the Filter Gallery, choose Photocopy and set Detail and Darkness to 10.


10 Urban skyscrapers
Repeat the steps for ‘Building_One.tif’ on the images ‘Building_
Two.tif’, ‘Building_Three.tif’ and ‘Building_Four.tif.’ Scale the buildings using
the screenshot as guide. Click on each layer to duplicate and again mask
out the background around the buildings. Set the original layers to
Normal and the duplicated layers to Overlay. In the Filter Gallery, under
Photocopy set the sliders for Detail and Darkness at 10 and 5 for Building
Two, at 10 and 6 for Building Three and at 9 and 7 for Building Four.

11 Cloning cars
Now you are going to work on the image ‘Shell Car 3_RG B.tif’. As you are going to flip the image horizontally, the text on the car will be a mirror image so you need to remove the text from the car. Using the Clone tool, take a sample of the area that needs to be matched and paint out the number one and the text on the side of the car. Next, to flip the image go to Image> Rotation>Flip Canvas Horizontally. Afterwards, save this image.

12 Eco-warriors
Open up ‘Shell car 1_RG B.tif’. Drag-and-drop the image onto the main canvas. Go to Edit>Transform>Scale and scale it down to size, as seen in the screenshot. Add a mask layer and take out the background around the car. Duplicate this layer and rename it as with other duplicated layers. Go into the Filter Gallery, select Photocopy and set Detail and Darkness to 10 and 10. Set this layer to Overlay and the original layer to Normal. Repeat this process with ‘shell car 2_RG B.tif’.


13 More cars
Next, open up your newly cloned version of ‘Shell Car 3_RG B.tif’. Drag-and-drop the image onto the main canvas. As with the other cars, go to Edit>Transform>Scale and scale it down to size. Add a mask layer and take out the background. Duplicate this layer and rename it. Go into the Filter Gallery, select Photocopy and set Detail and Darkness to 10 and 10. Set this layer to Overlay and the original layer to Normal. As ever, make the most of the opportunity here to take a break for five minutes so you
can come back to the image with a fresh perspective.

14 Paper texture
Add a new group to the Layers palette for the background. Next, open up the file ‘ellie pooh paper orang_RG B.tif’. Drag-and-drop the paper onto the canvas, and it will become part of the background group. Go to Edit>Transform>Scale and scale to fit it to your canvas. In the new group you just created, add the ellie pooh paper layer. This is to help you organise your files. Now make a mask and erase all of the background above and in-between the buildings (where the sky would be), so the texture is just left in the foreground.

15 Greyscale


Open up your folder and import the file ‘GoodYear_RG B.tif’. There is a lot of unwanted sky in the background around the blimp. Crop out the blimp, eliminating as much of the sky around it as possible. Drag-and-drop it into your illustration. With the Quick Selection tool, outline the blimp and go to Edit>Cut. Duplicate this layer and rename it ‘Goodyear Photocopy’. Go into the Filter Gallery, select Photocopy and set Detail and Darkness to 10 and 10. Set this layer to Overlay and the original layer to Normal. Duplicate the original layer again and set this new layer on top of Goodyear Photocopy. Set to Color Dodge.


In order to add a more drawn-in effect to Cars 1 and 3, duplicate Car Layer 1 and place the duplicated layer on top of the Photocopy layer in the Layers palette. Set to Overlay. Repeat this process with Car 3, except we will set it to Linear Burn.

The buildings are now too light. To correct this, you need to darken them up but without touching the rest of the illustration. Highlight the Building layers only, making sure that the Staples Center and Rail Track layers are not selected. In the Layers palette, click on Merge Down. Select the Adjustments tab and at the bottom of the panel are two overlapping circles (the Clip function). Click on those. Set the three levels to 0, 0.57 and 255, respectively.

Now is the time to apply colour correction that you need to finish your image. This is a personal preference, so adjust the colours to suit your liking. Use the same Merge Down process that you previously used on the background buildings to do this. Once you’re happy, your image is ready for printing. Because of the large image size, save a layered copy of this file for the future then flatten it all before printing.


21 Final Illustration

“Photoshop can only do so
much and, depending on
the quality of the photos,
there may be small gaps in
the merged image”
At last, a good use for Photoshop filters – photocopying! To get the type of texture that we want for this image, we can either take the images that we are creating and literally photocopy them on a photocopier and then scan the copied images back in as layers, or we can use the Filter Gallery in CS4. Click and highlight Rail Train, the first layer that you are going to work on. In the Layers palette, click on Duplicate. Make sure you are working on the duplicated layer, then click on the Filter drop-down menu. Under the menu box in the Filter Gallery palette, select Photocopy. There, you will see two settings: Detail and Darkness. Set these to 12 and 8 respectively. Now repeat these steps for Staples Center Panoramic. Name your duplicate layers with a photocopy to identify them. Set both of the photocopy layers to Overlay and both of the original layers to Normal.
Open up ‘Building_One_RG B.tif’ from the disc. Drag-and-drop the image onto the working canvas. Place the layer at the bottom the layer stack and set to Normal. Scale and stretch this image as seen in the screenshot. Add a mask as you did in the previous steps. Duplicate this layer and, in the Filter Gallery, choose Photocopy and set Detail and Darkness to 10.
10 Urban skyscrapers
Repeat the steps for ‘Building_One.tif’ on the images ‘Building_
Two.tif’, ‘Building_Three.tif’ and ‘Building_Four.tif.’ Scale the buildings using
the screenshot as guide. Click on each layer to duplicate and again mask
out the background around the buildings. Set the original layers to
Normal and the duplicated layers to Overlay. In the Filter Gallery, under
Photocopy set the sliders for Detail and Darkness at 10 and 5 for Building
Two, at 10 and 6 for Building Three and at 9 and 7 for Building Four.
11 Cloning cars
Now you are going to work on the image ‘Shell Car 3_RG B.tif’. As you are going to flip the image horizontally, the text on the car will be a mirror image so you need to remove the text from the car. Using the Clone tool, take a sample of the area that needs to be matched and paint out the number one and the text on the side of the car. Next, to flip the image go to Image> Rotation>Flip Canvas Horizontally. Afterwards, save this image.
Open up ‘Shell car 1_RG B.tif’. Drag-and-drop the image onto the main canvas. Go to Edit>Transform>Scale and scale it down to size, as seen in the screenshot. Add a mask layer and take out the background around the car. Duplicate this layer and rename it as with other duplicated layers. Go into the Filter Gallery, select Photocopy and set Detail and Darkness to 10 and 10. Set this layer to Overlay and the original layer to Normal. Repeat this process with ‘shell car 2_RG B.tif’.
13 More cars
Next, open up your newly cloned version of ‘Shell Car 3_RG B.tif’. Drag-and-drop the image onto the main canvas. As with the other cars, go to Edit>Transform>Scale and scale it down to size. Add a mask layer and take out the background. Duplicate this layer and rename it. Go into the Filter Gallery, select Photocopy and set Detail and Darkness to 10 and 10. Set this layer to Overlay and the original layer to Normal. As ever, make the most of the opportunity here to take a break for five minutes so you
can come back to the image with a fresh perspective.
14 Paper texture
Add a new group to the Layers palette for the background. Next, open up the file ‘ellie pooh paper orang_RG B.tif’. Drag-and-drop the paper onto the canvas, and it will become part of the background group. Go to Edit>Transform>Scale and scale to fit it to your canvas. In the new group you just created, add the ellie pooh paper layer. This is to help you organise your files. Now make a mask and erase all of the background above and in-between the buildings (where the sky would be), so the texture is just left in the foreground.
To add interest, you’re going to create a comic-book look to the illustration. In the Layers palette, add a new layer and name it ‘White Background’. Select the Paint Bucket tool, choose white as the background colour and fill the layer with white. In the Layers palette, set the blending mode to Hue. This will allow your illustration to mimic a pencil sketch. To bring back some of the colour to the illustration, add a mask to the White Background layer and, with the Brush tool set at Hard Edge, erase the bottom third of the area, from the Staples Center, down.
16 Pick a color
Next, you’re going to add a grey background. Create a new group layer and name it ‘Sky Background’. The layer should be placed at the bottom of the building layers in the Layers palette. With the Gradient tool, set the foreground colour to blue ‘#02c4fc’ or RG B 2, 196, 252. Click OK. With the Gradient tool, draw down from the top centre of the illustration to the top of the buildings, approximately half of the way down. Set this layer to Normal. Duplicate the blue sky layer and drag the duplicated layer above White Background in the Layers palette, setting it to Linear Burn. As you can see, we now have a blue sky that is graduating to grey.
Quick Tip
“When cutting close to an area on your photographs,
holding down the Shift key while clicking the mouse
will erase a larger piece and in a straight line”
holding down the Shift key while clicking the mouse
will erase a larger piece and in a straight line”
17 It’s a Goodyear
Open up your folder and import the file ‘GoodYear_RG B.tif’. There is a lot of unwanted sky in the background around the blimp. Crop out the blimp, eliminating as much of the sky around it as possible. Drag-and-drop it into your illustration. With the Quick Selection tool, outline the blimp and go to Edit>Cut. Duplicate this layer and rename it ‘Goodyear Photocopy’. Go into the Filter Gallery, select Photocopy and set Detail and Darkness to 10 and 10. Set this layer to Overlay and the original layer to Normal. Duplicate the original layer again and set this new layer on top of Goodyear Photocopy. Set to Color Dodge.
18 More work on the cars
In order to add a more drawn-in effect to Cars 1 and 3, duplicate Car Layer 1 and place the duplicated layer on top of the Photocopy layer in the Layers palette. Set to Overlay. Repeat this process with Car 3, except we will set it to Linear Burn.
19 Up the levels
The buildings are now too light. To correct this, you need to darken them up but without touching the rest of the illustration. Highlight the Building layers only, making sure that the Staples Center and Rail Track layers are not selected. In the Layers palette, click on Merge Down. Select the Adjustments tab and at the bottom of the panel are two overlapping circles (the Clip function). Click on those. Set the three levels to 0, 0.57 and 255, respectively.
Quick Tip
“When designing images for large-format printing,
have the resolution at 300dpi or 360dpi.
Only use 72dpi when creating graphics
meant for specific designs”
20 Work the Color Balance
Now is the time to apply colour correction that you need to finish your image. This is a personal preference, so adjust the colours to suit your liking. Use the same Merge Down process that you previously used on the background buildings to do this. Once you’re happy, your image is ready for printing. Because of the large image size, save a layered copy of this file for the future then flatten it all before printing.
21 Final Illustration
“Photoshop can only do so
much and, depending on
the quality of the photos,
there may be small gaps in
the merged image”
No comments:
Post a Comment